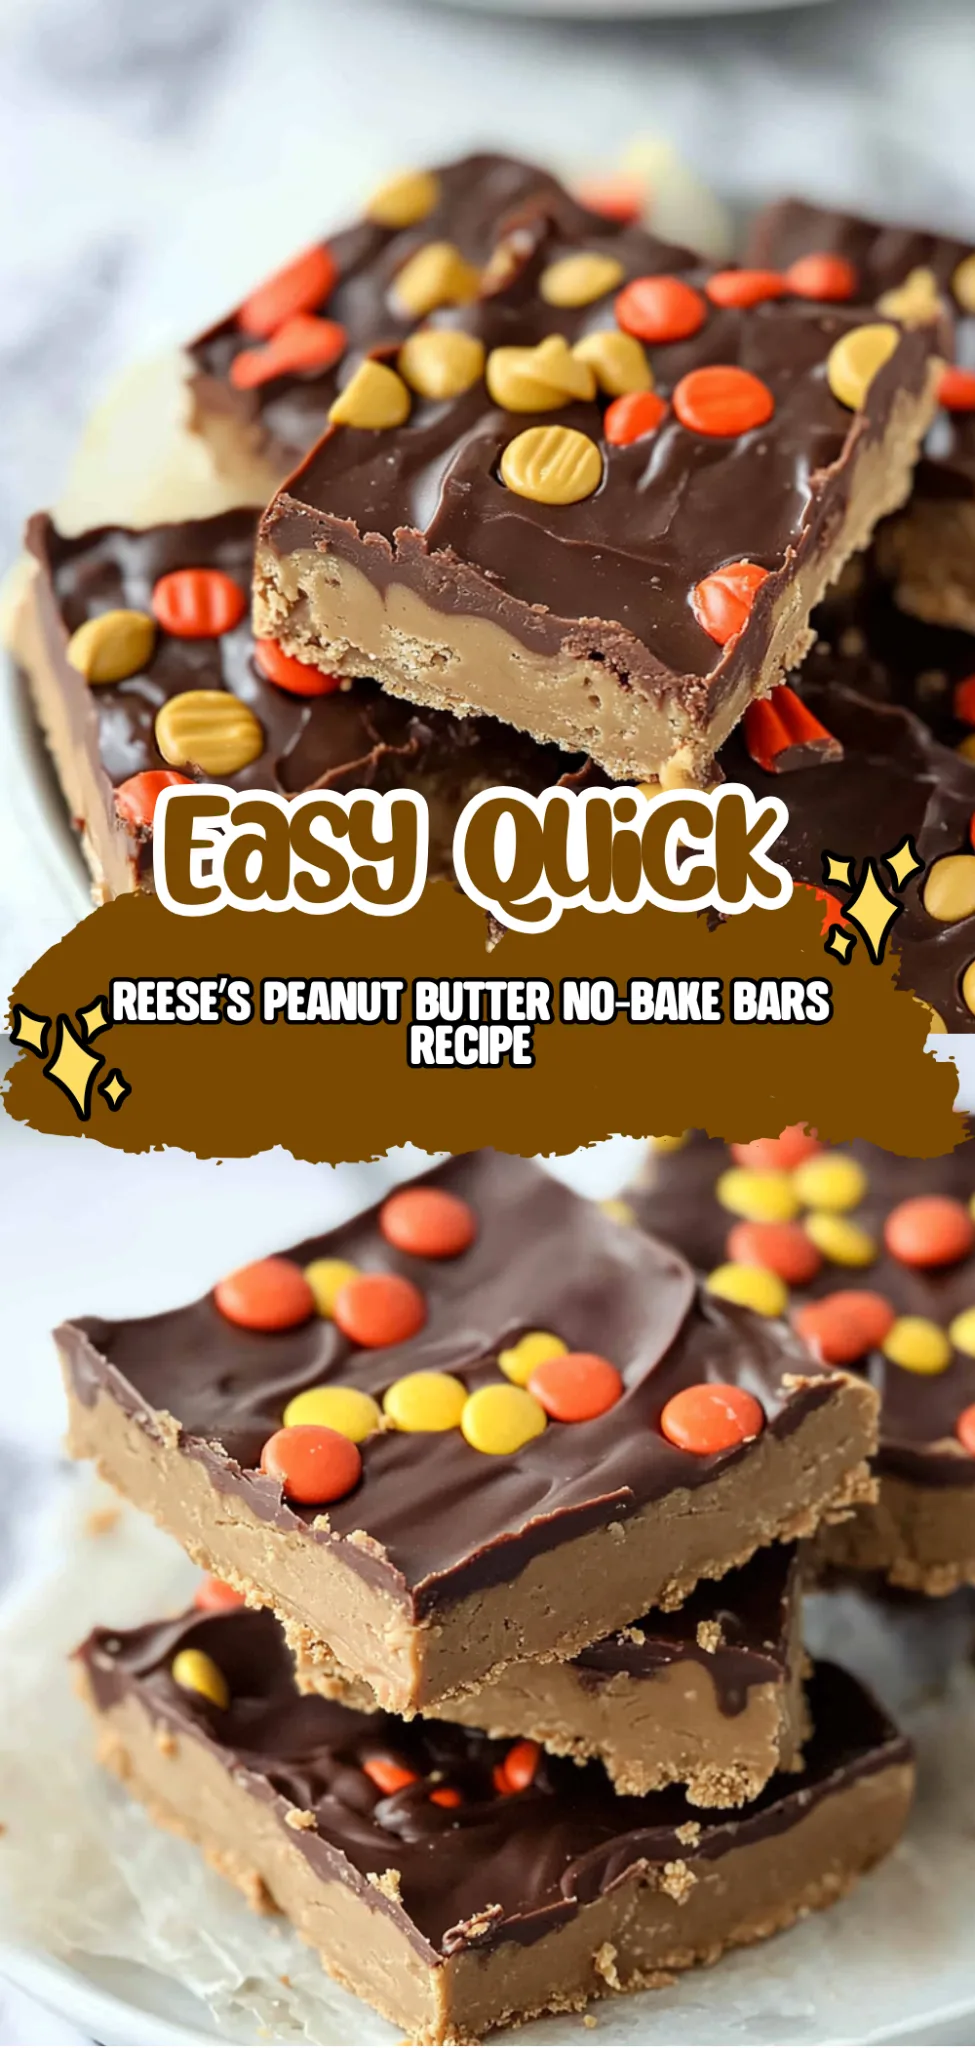
Indulge in the rich, velvety layers of Reese’s Peanut Butter No-Bake Bars, where creamy peanut butter meets luscious chocolate in a delightful embrace. The moment you take a bite, the smooth texture melts in your mouth, releasing a symphony of sweet and salty flavors that evokes comfort and nostalgia—perfect for an impromptu gathering or a cozy night in.
What makes this dessert truly exceptional is its effortless preparation; no oven required means you can whip up these bars in mere minutes. With just a handful of simple ingredients, including the star, Reese’s peanut butter, each bar becomes a decadent treat that’s perfect for sharing—or savoring all on your own. Dive into this easy-to-make Reese’s Peanut Butter No-Bake Bars Recipe and experience pure bliss with every bite.
Why You’ll Love This Reese’s Peanut Butter No-Bake Bars
These Reese’s Peanut Butter No-Bake Bars are the ultimate indulgence, combining the creamy richness of peanut butter with the decadent sweetness of chocolate for a flavor explosion that will have you reaching for seconds. The base is a delightful balance of crunchy graham cracker crumbs and smooth, melted butter, creating a texture that perfectly contrasts with the velvety topping of semi-sweet chocolate chips. Drizzling just a touch more peanut butter on top not only enhances the visual appeal but also adds an extra layer of nutty goodness. Each bite melts in your mouth, delivering an irresistible blend of flavors that will make this recipe a staple in your dessert rotation. Don’t wait another minute—these bars are calling your name, and they’re ready to be whipped up in no time!
What Kind of Peanut Butter Should I Use?
For this Reese’s Peanut Butter No-Bake Bars recipe, creamy peanut butter is the best choice. Its smooth texture blends beautifully with the other ingredients, creating a rich and cohesive base that holds together perfectly without any graininess. The creaminess also helps to balance the sweetness from the powdered sugar and graham cracker crumbs, ensuring a harmonious flavor profile. If you’re looking for a common alternative, you can use crunchy peanut butter; just keep in mind that it will add a bit of texture and may not bind quite as smoothly as creamy peanut butter does. If you opt for crunchy, simply stir it in gently to maintain some of that delightful crunch while still achieving a satisfying bar consistency.
What You’ll Need for Reese’s Peanut Butter No-Bake Bars
Each ingredient in this dish plays an essential role in flavor and texture. Here’s what you’ll need:
- 1 cup graham cracker crumbs: Provides a sweet and crunchy base that complements the creamy filling.
- 1 cup powdered sugar: Adds sweetness and helps bind the ingredients together for a smooth texture.
- 1 cup creamy peanut butter: Infuses rich, nutty flavor and creaminess that is essential to the bars.
- 1/2 cup unsalted butter (melted): Acts as a binding agent, enriching the bars with moisture and flavor.
- 1 cup semi-sweet chocolate chips: Delivers luscious chocolatey goodness that perfectly contrasts the peanut butter.
- 1 tbsp peanut butter (for drizzling): Enhances the overall peanut flavor while adding a decorative touch.
Step-by-Step: How to Make Reese’s Peanut Butter No-Bake Bars
Build the Base
In a mixing bowl, combine 1 cup of graham cracker crumbs, 1 cup of powdered sugar, 1 cup of creamy peanut butter, and 1/2 cup of melted unsalted butter. Use a spatula or wooden spoon to mix the ingredients together until they are well combined and form a slightly sticky dough. Make sure there are no dry pockets of graham cracker or sugar; the mixture should have an even consistency that holds together when pressed.
Press into Dish
Once your base mixture is ready, transfer it to a greased 9×13 inch baking dish. Using your hands or a spatula, press the mixture evenly into the bottom of the dish, ensuring that it is compact and level. This helps create a firm foundation for your bars. Aim for an even thickness across the surface to ensure uniform cutting later.
Melt the Chocolate
In a microwave-safe bowl, add 1 cup of semi-sweet chocolate chips. Microwave in 30-second intervals, stirring well between each interval until the chocolate is completely melted and smooth in texture. Be cautious not to overheat; if you notice any signs of burning or seizing up, stop immediately. The chocolate should be glossy and free of lumps.
Spread the Chocolate
Pour the melted chocolate over your prepared peanut butter base in the baking dish. Using a spatula, spread it evenly across the surface so that it covers all corners and edges. This layer should be smooth and glossy, providing a beautiful finish to your dessert.
Drizzle with Peanut Butter
If desired, take 1 tablespoon of creamy peanut butter and gently drizzle it over the top of the melted chocolate. You can achieve this by either using a spoon or placing it in a small microwave-safe bowl for a few seconds to soften it slightly before drizzling. The contrast between the chocolate and peanut butter will enhance both flavor and visual appeal.
Chill Until Set
Refrigerate your assembled bars for at least 45 minutes or until they are firmly set. You’ll know they’re ready when they feel solid to the touch and no longer wobble in the dish. Chilling allows the layers to meld together beautifully while enhancing their overall flavor.
Cut and Serve
Once set, remove the bars from the refrigerator and carefully cut them into squares or rectangles using a sharp knife. Wipe your knife with a damp cloth between cuts for cleaner edges if desired. Serve immediately or store them in an airtight container in the fridge for up to one week—if they last that long!
How to Serve and Store Reese’s Peanut Butter No-Bake Bars
These Reese’s Peanut Butter No-Bake Bars yield 16 delightful servings, making them perfect for sharing at gatherings or enjoying as a sweet treat after dinner. To serve, consider cutting the bars into squares and drizzling a little extra peanut butter on top for an appealing presentation. Pair them with a scoop of vanilla ice cream or a dollop of whipped cream to balance the rich flavors, while fresh fruit like strawberries can add a refreshing contrast.
To store any leftovers, place the bars in an airtight container and refrigerate for up to one week. If you want to reheat them, do so gently in the microwave in short intervals to prevent melting the base too much; about 10-15 seconds should suffice. While these bars can be frozen, be aware that the texture may become slightly crumbly upon thawing, but they’ll still taste delicious!
Creamy Mashed Potatoes
The velvety texture of creamy mashed potatoes provides a delightful contrast to the rich, sweet layers of the no-bake bars.
Roasted Brussels Sprouts
The slight bitterness of roasted Brussels sprouts balances the sweetness of the bars, while their crispy edges add a satisfying crunch.
Garlic Bread
Warm, buttery garlic bread offers a savory counterpart to the sweet and nutty flavors of the Reese’s bars, making for an irresistible combination.
Fresh Fruit Salad
A refreshing fruit salad with berries and citrus complements the rich peanut butter and chocolate with its vibrant acidity and juicy textures.
Cheesy Macaroni
The gooey, cheesy goodness of macaroni adds a comforting element that pairs well with the sweet and nutty flavors of the dessert.
Spicy Sweet Potato Fries
The sweet and spicy profile of these fries enhances the chocolate and peanut butter notes, providing an unexpected yet delicious contrast.
Frequently Asked Questions
Can I use almond butter instead of peanut butter? Yes, you can substitute almond butter for peanut butter in this recipe. Just keep in mind that it will slightly alter the flavor, giving the bars a nuttier taste.
Are these no-bake bars gluten-free? Yes, these bars can be made gluten-free by using gluten-free graham cracker crumbs. Just check the packaging to ensure they meet your dietary needs.
Can I freeze Reese’s Peanut Butter No-Bake Bars? Absolutely! These bars freeze well. After cutting them into pieces, place them in an airtight container with parchment paper between layers and store them in the freezer for up to three months.
How do I know when the bars are set properly? The bars are ready when they feel firm to the touch and hold their shape after being removed from the fridge. If they are still soft in the center after 45 minutes, give them more time to chill.
Can I add nuts or other mix-ins to the base? Yes, feel free to mix in chopped peanuts or other nuts into the base before pressing it into the baking dish. This will add a delightful crunch and enhance the overall flavor of your bars.
Conclusion
These Reese’s Peanut Butter No-Bake Bars are not just a treat; they’re a delightful combination of rich chocolate and creamy peanut butter that makes for an impressive yet effortless dessert. If you loved this recipe, be sure to explore more sweet delights like [No-Bake Chocolate Cheesecake] or [Peanut Butter Banana Bites] that perfectly complement your newfound favorite. We’d love for you to save the recipe on Pinterest and share your creations with our community—let’s celebrate these delicious moments together!

Leave a Comment