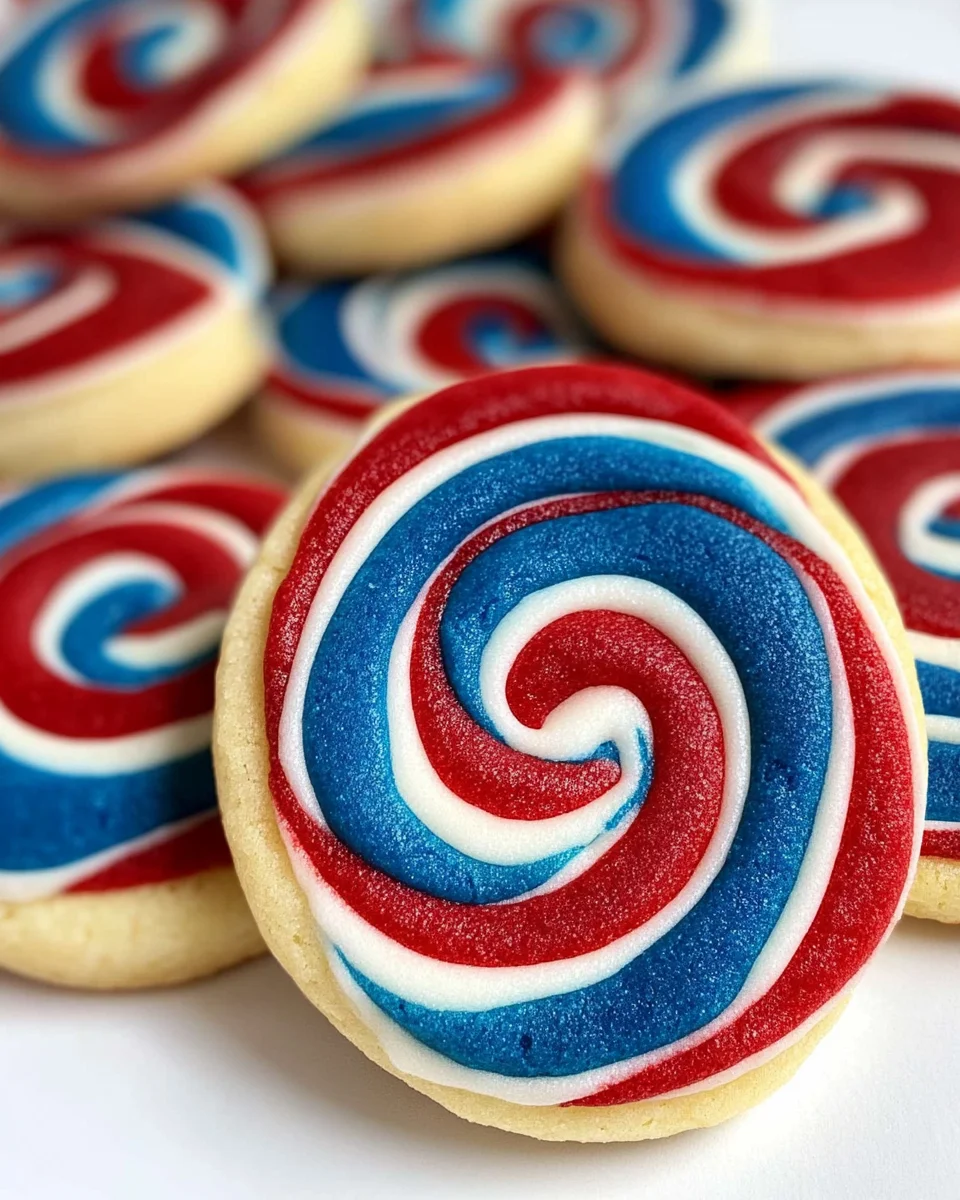
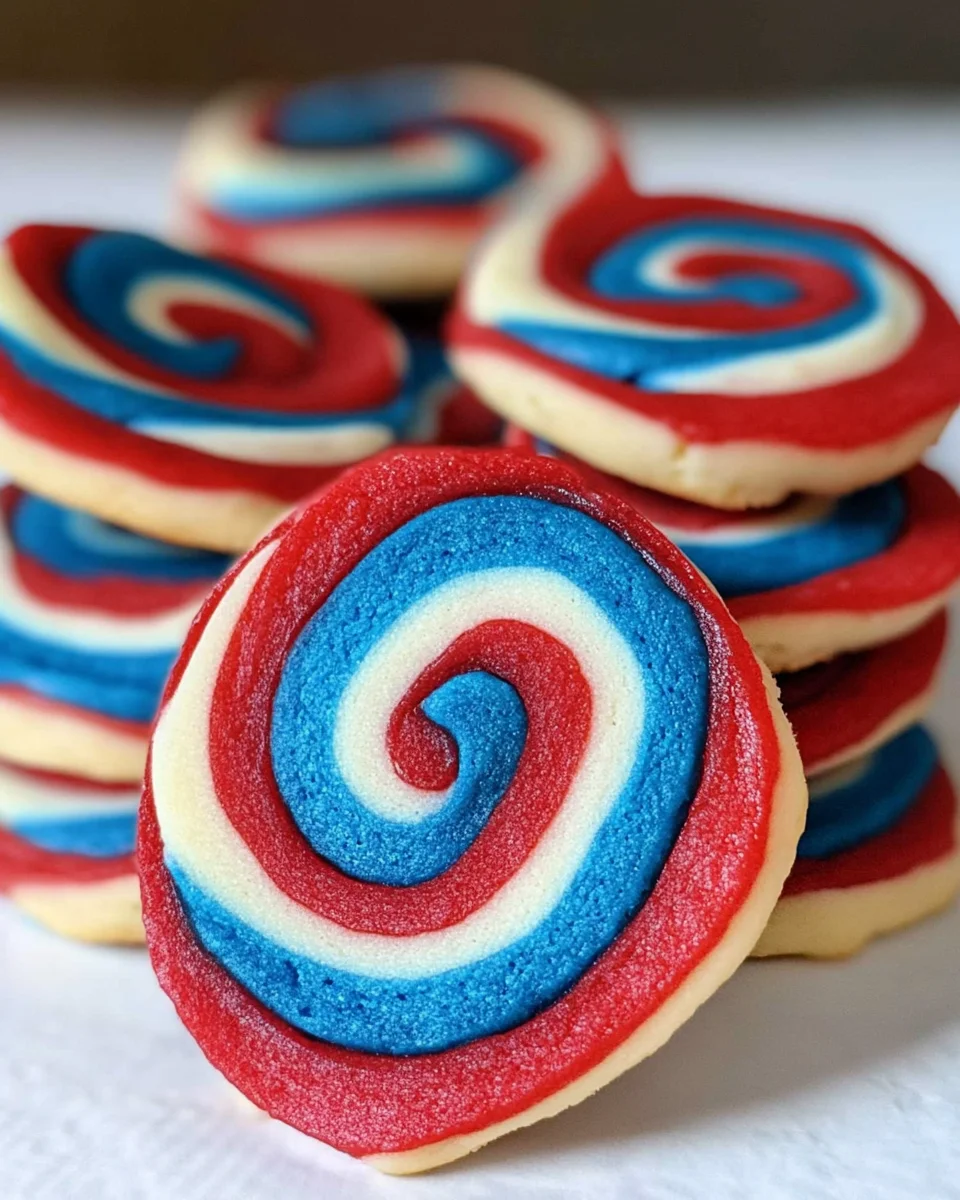
Serve up a sweet finale at your 4th of July feast with soft and chewy Red, White and Blue Pinwheel Icebox Cookies. These colorful cookies are not only visually appealing but also deliciously satisfying. Perfect for celebrations or any summer gathering, they capture the festive spirit with their vibrant colors and delightful flavors. With simple ingredients and easy preparation, you can whip up a batch that will impress family and friends alike.
Why You’ll Love This Recipe
- Visually Stunning: The vibrant red, white, and blue layers make these cookies a showstopper at any party.
- Easy to Make: This icebox cookie recipe requires minimal hands-on time, allowing you to focus on other party preparations.
- Perfect for Any Occasion: While ideal for the 4th of July, these cookies are suitable for birthdays, picnics, and more.
- Soft and Chewy Texture: Enjoy the melt-in-your-mouth softness that makes every bite delightful.
- Customizable Colors: Feel free to adjust the color intensity or use different shades to match any theme.
Tools and Preparation
Before diving into making your Red, White and Blue Pinwheel Icebox Cookies, gather the essential tools. Having the right equipment will streamline your baking process.
Essential Tools and Equipment
- Stand mixer
- Mixing bowls
- Plastic wrap
- Wax paper
- Rolling pin
- Baking sheets
Importance of Each Tool
- Stand mixer: This tool saves time by efficiently creaming butter and sugar together.
- Wax paper: Perfect for rolling out dough without sticking; it aids in creating even layers.
- Baking sheets: Ensures even baking of your cookies while providing ample space.
Ingredients
Ingredients:
– 3 cups all-purpose flour
– 1/2 teaspoon baking powder
– 1/2 teaspoon salt
– 1 cup (2 sticks) unsalted butter
– 1 1/3 cups sugar
– 2 large eggs
– 2 teaspoons vanilla extract
– Red food coloring
– Blue food coloring
How to Make Red, White and Blue Pinwheel Icebox Cookies
Step 1: Prepare Your Dry Ingredients
In a medium bowl, sift together the flour, baking powder, and salt.
Step 2: Cream Butter and Sugar
In the bowl of a stand mixer fitted with the paddle attachment:
1. Beat the butter until smooth for about 2 minutes.
2. Add the sugar, beating until light and fluffy (about 3 minutes).
3. Add the eggs, one at a time, beating well after each addition. Finally, mix in the vanilla extract.
Step 3: Combine Wet and Dry Ingredients
Turn off the mixer:
1. Add the sifted dry ingredients to the bowl.
2. Mix just until combined.
Step 4: Divide Dough for Coloring
Remove the dough from the bowl:
1. Separate it into three equal pieces.
2. Shape one piece into a 4-by-4-inch square, wrap in plastic wrap, and refrigerate (this will be your white dough).
Step 5: Color Your Dough
For the red dough:
1. Return one piece to the stand mixer.
2. With the mixer on low speed, add red food coloring until desired color is achieved.
3. Shape into a square, wrap in plastic wrap, and refrigerate.
Clean out the bowl before proceeding with blue dough:
1. Repeat with the blue food coloring as done with red.
Step 6: Chill Your Dough
Refrigerate all colored dough squares for about 30 minutes.
Step 7: Roll Out Dough Layers
Prepare to roll out each color:
1. Cut each square in half to form two rectangles.
2. Wrap half of each color in plastic wrap; set aside in the fridge.
3. Roll out each color between wax paper until about 1/8-inch thick.
Step 8: Assemble Layers
Layer your rolled dough:
1. Stack red on white followed by blue using wax paper for transfer.
2. Lightly roll layers together to combine them.
Step 9: Form Logs
Starting from one end:
1. Roll tightly into a log shape.
2. Wrap logs in wax paper followed by plastic wrap; refrigerate for an hour.
Step 10: Final Chill
After chilling logs:
1. Roll them again on counter surfaces to avoid flat sides.
2. Refrigerate upright in glasses or lay flat for another four hours.
Step 11: Preheat Oven
When ready to bake:
1. Set oven temperature to 350ºF.
2. Line two baking sheets with parchment paper.
Step 12: Slice Cookies
Remove logs from fridge:
1. Slice each log into rounds about 1/4-inch thick.
2. Place rounds on prepared baking sheets about two inches apart.
Step 13: Bake
Bake cookies for approximately:
– 9 to 11 minutes until pale golden.
Transfer cookies onto wire racks to cool completely.
★ Did you make this recipe? Don’t forget to give it a star rating below!
How to Serve Red, White and Blue Pinwheel Icebox Cookies
These delightful cookies make a stunning addition to any festive gathering, especially during the 4th of July. Here are some creative serving suggestions to impress your guests.
Cookie Platter
- Arrange the cookies on a decorative platter for a colorful display. Add fresh berries or edible flowers around the cookies for an extra touch.
Ice Cream Sandwiches
- Use two cookies to create ice cream sandwiches. Choose vanilla or strawberry ice cream for a classic summer treat that will delight everyone.
Party Favors
- Package individual cookies in clear bags tied with red, white, and blue ribbons. These make great party favors for your guests to take home.
Dessert Table Feature
- Include the cookies as part of a larger dessert table. Pair them with other red, white, and blue desserts like cupcakes or fruit tarts for a cohesive theme.
How to Perfect Red, White and Blue Pinwheel Icebox Cookies
To ensure your cookies turn out perfectly every time, follow these helpful tips.
- Chill the dough: Refrigerating the dough helps it hold its shape while baking.
- Use wax paper: Rolling the dough between wax paper prevents sticking and makes it easier to transfer layers.
- Tight rolls matter: Roll the dough tightly to create well-defined pinwheels that look beautiful when sliced.
- Monitor baking time: Keep an eye on the cookies as they bake; they should be pale golden but not brown.
- Let them cool: Allow the cookies to cool completely before stacking or storing to prevent them from becoming soggy.
Best Side Dishes for Red, White and Blue Pinwheel Icebox Cookies
These cookies pair wonderfully with various side dishes that complement their sweet flavors. Here are some tasty suggestions.
- Fruit Salad – A refreshing mix of seasonal fruits such as strawberries, blueberries, and bananas adds brightness to your dessert spread.
- Patriotic Pudding Cups – Layer vanilla pudding with crushed graham crackers and berries in clear cups for a fun presentation.
- Mini Cheesecakes – Individual cheesecakes topped with berry compote offer a creamy contrast to the cookie’s texture.
- Watermelon Slices – Fresh watermelon slices are hydrating and provide a juicy contrast to the rich sweetness of the cookies.
- Yogurt Parfaits – Layer yogurt with granola and mixed berries for a healthier option that still feels festive.
- Chocolate Dipped Pretzels – Salty pretzels dipped in chocolate add crunch and balance out the sweetness of your dessert table.
Common Mistakes to Avoid
Making Red, White and Blue Pinwheel Icebox Cookies can be a fun process, but certain mistakes can hinder your results. Here are some common pitfalls to watch out for:
-
Neglecting to chill the dough: Chilling is essential for achieving the right texture. If you skip this step, the cookies may spread too much and lose their shape.
-
Using too much food coloring: It’s easy to get carried away with colors. Start with a small amount of food coloring and gradually add more until you reach your desired shade.
-
Not measuring ingredients accurately: Baking requires precision. Use proper measuring cups and spoons to ensure the correct amounts of flour, sugar, and butter.
-
Rolling the dough too thin: If your layers are too thin, the cookies may crumble when sliced. Aim for an even thickness of about 1/8-inch for best results.
-
Overbaking the cookies: Keep a close eye on baking time. Overbaked cookies can become hard instead of soft and chewy. Look for a pale golden color to know when they’re done.
Storage & Reheating Instructions
Refrigerator Storage
- Store in an airtight container: This keeps the cookies fresh for up to 5 days.
- Use parchment paper between layers: This prevents sticking.
Freezing Red, White and Blue Pinwheel Icebox Cookies
- Wrap tightly: Use plastic wrap followed by aluminum foil to avoid freezer burn.
- Freeze for up to 3 months: You can enjoy them later without losing flavor or texture.
Reheating Red, White and Blue Pinwheel Icebox Cookies
- Oven: Preheat to 350ºF and warm cookies for about 5 minutes.
- Microwave: Heat one cookie at a time for about 10-15 seconds for a soft treat.
- Stovetop: Place in a covered pan on low heat for a few minutes until warm.
Frequently Asked Questions
Here are some common questions about making Red, White and Blue Pinwheel Icebox Cookies:
Can I use different colors?
Yes! Feel free to experiment with different food colors to match any occasion or theme.
How long do these cookies last?
When stored properly, Red, White and Blue Pinwheel Icebox Cookies can last up to 5 days in the refrigerator and around 3 months in the freezer.
Are these cookies suitable for gluten-free diets?
You can use a gluten-free flour blend as a substitute, although it may affect texture slightly.
What can I serve with these cookies?
These delightful cookies pair well with milk, coffee, or even ice cream for an extra treat!
Final Thoughts
Red, White and Blue Pinwheel Icebox Cookies are not only visually stunning but also deliciously satisfying. They make a perfect addition to any summer celebration or holiday gathering. Feel free to customize the flavors or colors according to your preferences. Give this recipe a try; it’s sure to impress family and friends!
Red, White and Blue Pinwheel Icebox Cookies

Indulge in the festive spirit with Red, White and Blue Pinwheel Icebox Cookies, a delightful treat perfect for your summer celebrations. These colorful cookies feature vibrant layers of red, white, and blue, making them a visually appealing addition to any gathering. Soft and chewy in texture, they are easy to make with simple ingredients that will impress your family and friends. Whether you’re celebrating the 4th of July or hosting a summer picnic, these cookies will be the star of the dessert table. Follow this straightforward recipe to create a batch that’s not only delicious but also a fun activity for kids to help with!
- Prep Time: 30 minutes
- Cook Time: 11 minutes
- Total Time: 41 minutes
- Yield: Approximately 24 cookies 1x
- Category: Dessert
- Method: Baking
- Cuisine: American
Ingredients
- 3 cups all-purpose flour
- 1/2 teaspoon baking powder
- 1/2 teaspoon salt
- 1 cup (2 sticks) unsalted butter
- 1 1/3 cups sugar
- 2 large eggs
- 2 teaspoons vanilla extract
- Red food coloring
- Blue food coloring
Instructions
- In a medium bowl, sift together flour, baking powder, and salt.
- In a stand mixer, cream butter and sugar until light and fluffy. Add eggs one at a time then mix in vanilla.
- Gradually add dry ingredients until just combined; divide dough into three pieces.
- Color two pieces with red and blue food coloring, leaving one plain.
- Chill all colored dough squares for about 30 minutes.
- Roll out each color between wax paper to about 1/8-inch thick.
- Layer red on white followed by blue; roll tightly into logs.
- Refrigerate logs for an hour before slicing into rounds.
- Bake at 350°F for 9 to 11 minutes until pale golden.
Nutrition
- Serving Size: 1 cookie (30g)
- Calories: 120
- Sugar: 9g
- Sodium: 50mg
- Fat: 7g
- Saturated Fat: 4g
- Unsaturated Fat: 3g
- Trans Fat: 0g
- Carbohydrates: 13g
- Fiber: <1g
- Protein: <1g
- Cholesterol: 20mg


Leave a Comment