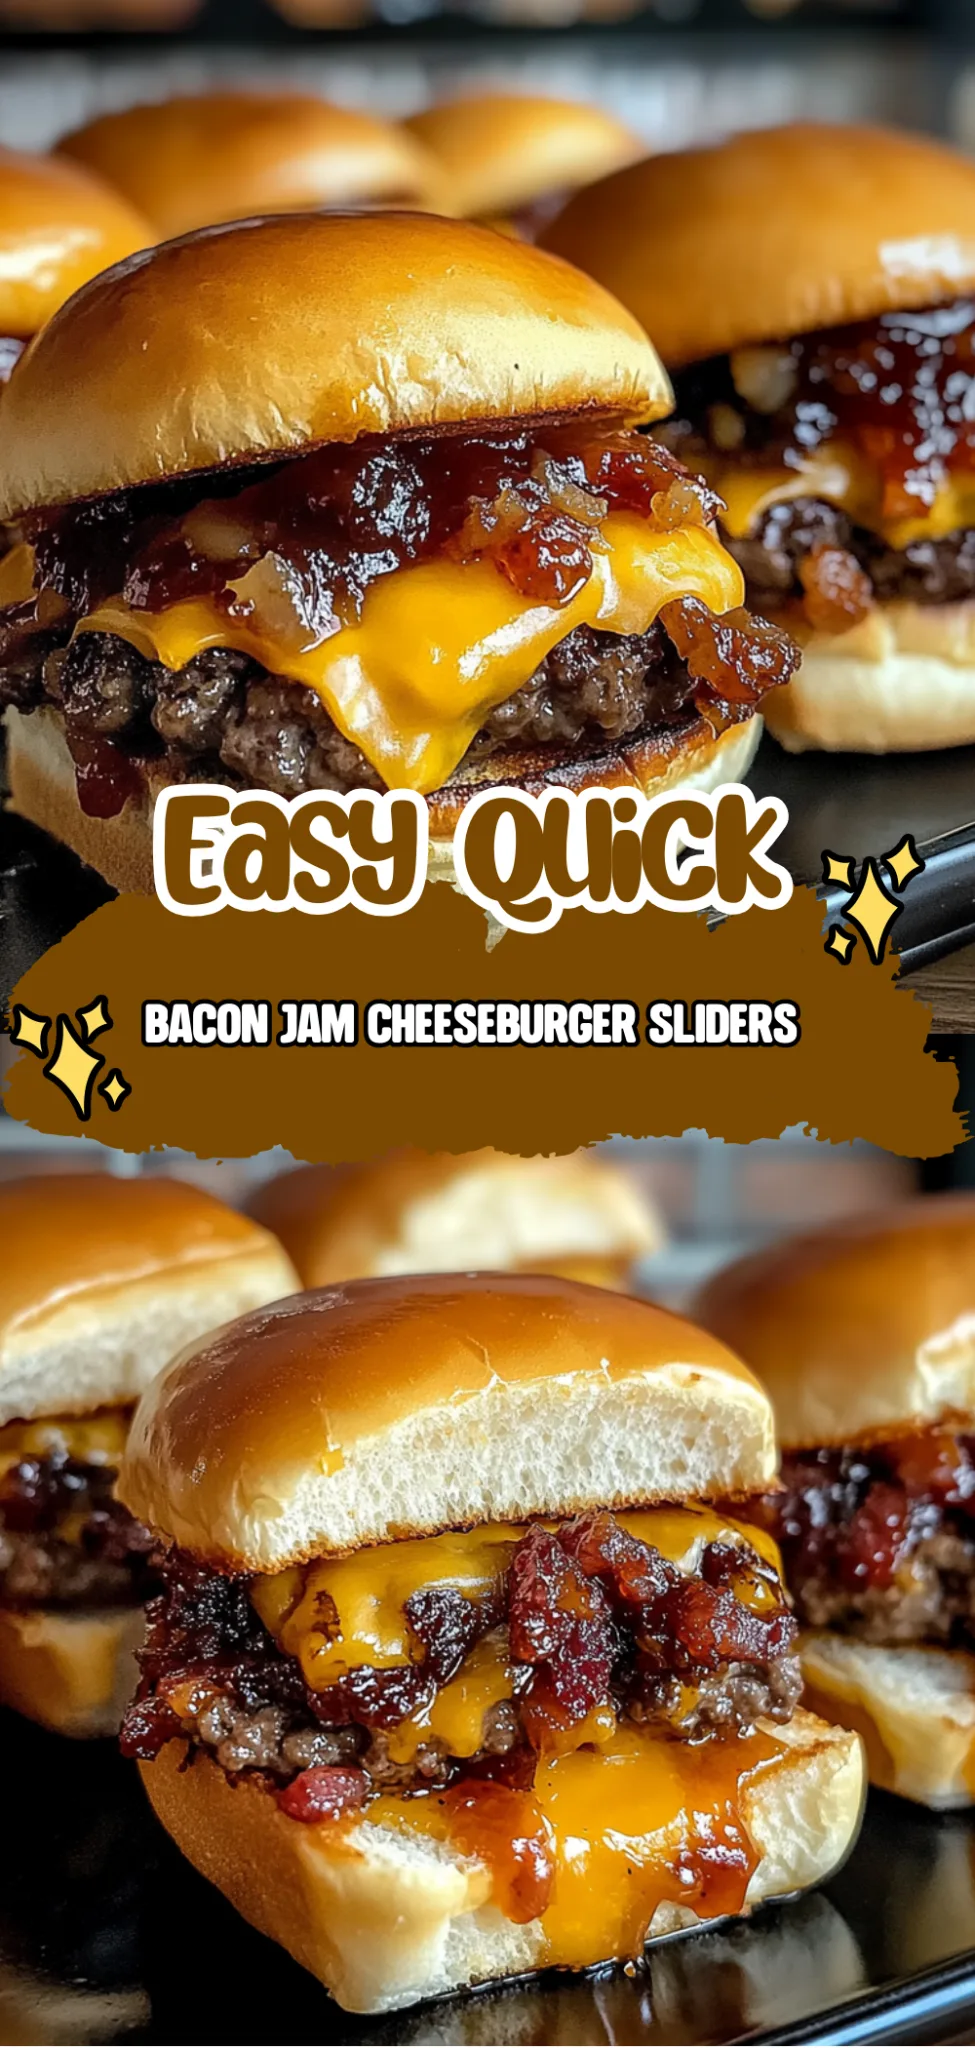
Imagine sinking your teeth into a warm, buttery slider, the savory aroma of sizzling beef mingling with the rich, sweet notes of homemade bacon jam. Each bite delivers a delightful contrast of textures—crispy bacon, juicy meat, and a soft bun—creating a comforting indulgence that’s perfect for gatherings or a cozy night in. These Bacon Jam Cheeseburger Sliders embody the essence of gourmet dining right at home, making any occasion feel special.
What sets these sliders apart is the luscious bacon jam that elevates them from simple appetizers to standout dishes worthy of any celebration. The slow-cooked blend of caramelized onions and smoky bacon adds an irresistible sweetness that complements the savory beef perfectly. Serve them at your next party or game day gathering, and watch as they disappear faster than you can say “delicious.”
Why You’ll Love This Bacon Jam Cheeseburger Sliders
You’ll fall head over heels for these Bacon Jam Cheeseburger Sliders, where the sweet and smoky notes of the bacon jam take center stage, creating a delicious contrast with the savory ground beef. The caramelized onions blended with brown sugar and a splash of apple cider vinegar offer a mouthwatering balance of flavors that elevate each bite, while the optional red pepper flakes add just the right hint of heat. As you sink your teeth into these mini marvels, you’ll be treated to an irresistible combination of textures—from the crispy bacon jam to the juicy sliders topped with creamy cheddar cheese. Perfect for game day or any gathering, these sliders are not just food; they’re an experience that will have everyone coming back for more—so why wait? Get ready to whip up a batch and impress your friends and family tonight!
What Kind of Bacon Should I Use?
For the best results in your Bacon Jam Cheeseburger Sliders, I recommend using thick-cut, high-quality bacon. Thick-cut bacon not only delivers a satisfying texture but also holds up well during the cooking process, allowing it to crisp nicely while rendering its fat for a rich flavor. The savory essence of quality bacon pairs perfectly with the sweetness of the brown sugar and maple syrup in the jam, creating a delightful balance. If you opt for standard-cut bacon, just keep in mind that it will cook faster; therefore, you may need to adjust your cooking time accordingly to prevent it from becoming overly crispy or chewy.
Ingredients for the Bacon Jam Cheeseburger Sliders
Each ingredient in this dish plays an essential role in flavor and texture. Here’s what you’ll need:
Bacon Jam
8 oz bacon (chopped): Provides a rich, savory base that enhances every bite.
1 medium onion (finely chopped): Adds sweetness and depth to the jam’s flavor.
1/2 cup brown sugar (packed): Balances the saltiness of the bacon with a touch of sweetness.
1/4 cup apple cider vinegar: Introduces acidity to brighten and cut through the richness.
1 tbsp maple syrup: Infuses a warm, complex sweetness that complements the bacon.
1 tsp black pepper (freshly ground): Delivers a subtle kick that enhances overall flavor.
1/2 tsp red pepper flakes (optional): Offers a hint of heat for those who enjoy a spicy touch.
Sliders
1 lb ground beef (80/20 blend): Ensures juicy, flavorful patties that hold up well in sliders.
1 tsp salt: Enhances the natural flavors of the beef and other ingredients.
1 tsp black pepper: Adds warmth and depth to the meat mixture.
4 slices cheddar cheese (cut in half): Melts beautifully, providing creamy richness with each bite.
12 slider buns mini hamburger buns: Perfectly sized to hold all the delicious fillings together.
1 cup lettuce (shredded): Adds crunch and freshness, balancing the richness of the jam and beef.
1/2 cup tomato (sliced): Provides juiciness and a refreshing contrast to the savory elements.
How To Make the Bacon Jam Cheeseburger Sliders
Cook the Bacon
In a skillet over medium heat, add the chopped bacon and cook until crispy, which should take about 5 to 7 minutes. Keep an eye on it to prevent burning; you want it deeply golden and fragrant. Once cooked, remove the bacon from the skillet and drain it on paper towels to absorb excess grease.
Sauté the Onion
In the same skillet, add the finely chopped onion and sauté until softened, approximately 5 minutes. The onions should become translucent and aromatic, adding depth to your bacon jam. Stir occasionally to ensure even cooking and prevent sticking.
Combine Ingredients for Bacon Jam
Next, stir in the packed brown sugar, apple cider vinegar, maple syrup, freshly ground black pepper, and optional red pepper flakes into the skillet with the onions. Cook this mixture for about 15 minutes over medium heat until it thickens slightly and becomes syrupy. The flavors will meld beautifully, creating a sweet and savory jam-like consistency.
Cool and Store the Bacon Jam
Remove the skillet from heat once your bacon jam has thickened to your liking. Let it cool for a few minutes before transferring it into a jar for easy storage or use immediately on your sliders. This jam can be made ahead of time and stored in the refrigerator for up to two weeks, making it perfect for game day prep.
Preheat Your Grill
Before grilling your sliders, preheat your grill or grill pan over medium-high heat for optimal cooking conditions. A hot grill is essential for creating a nice sear on your patties. Aim for a temperature that allows you to hear that satisfying sizzle when you place the meat down.
Form Slider Patties
In a mixing bowl, combine 1 pound of ground beef with 1 teaspoon of salt and 1 teaspoon of black pepper. Mix gently but thoroughly to avoid overworking the meat; then form this mixture into 12 small patties that are roughly equal in size. This ensures even cooking across all sliders.
Grill the Patties
Place your formed patties onto the preheated grill and cook them for about 3-4 minutes on each side or until they reach your desired doneness. For a medium burger, aim for an internal temperature of around 160°F (71°C). Don’t forget to flip them carefully using a spatula!
Melt the Cheese
During the last minute of grilling, place half slices of cheddar cheese on top of each patty to allow them to melt perfectly. Keep an eye out as this should only take about a minute; melted cheese adds richness that complements both beef and bacon jam beautifully.
Assemble Your Sliders
To assemble each slider, place one grilled patty onto each mini hamburger bun. Top generously with your homemade bacon jam, followed by shredded lettuce and sliced tomato for freshness. These layers will create a balance of flavors in each bite—sweetness from the jam paired with savory meat!
How to Serve and Store Bacon Jam Cheeseburger Sliders
These Bacon Jam Cheeseburger Sliders yield 4 servings, making them perfect for sharing at gatherings or game day. For an appetizing presentation, stack the sliders on a large platter with a side of crispy sweet potato fries or homemade potato chips that soak up the delicious bacon jam. Garnish with fresh lettuce and juicy tomato slices to add color and freshness, ensuring each bite is a delightful mix of textures and flavors.
To store any leftovers, place the sliders in an airtight container in the refrigerator, where they will stay fresh for up to 3 days. When reheating, do so gently on the stovetop over low heat, adding a splash of water or broth to the pan to keep the bacon jam moist and flavorful. While these sliders can be frozen, be aware that the texture may change slightly upon thawing; it’s best enjoyed fresh for optimal taste.
What to Serve With Bacon Jam Cheeseburger Sliders
Sweet Potato Fries
The natural sweetness and crispy texture of sweet potato fries perfectly balance the savory richness of the bacon jam.
Coleslaw
This crunchy and tangy slaw adds a refreshing contrast that cuts through the richness of the sliders, enhancing every bite.
Garlic Bread
Toasty and buttery garlic bread serves as an excellent vessel for mopping up any leftover bacon jam, adding an irresistible flavor punch.
Grilled Corn on the Cob
Charred and slightly sweet, grilled corn on the cob complements the smoky notes of the bacon while providing a delightful crunch.
Caesar Salad
A classic Caesar salad with its crisp romaine and creamy dressing provides a fresh, zesty contrast to the hearty sliders.
Macaroni and Cheese
Creamy macaroni and cheese delivers a comforting richness that pairs beautifully with the sweet-savory elements of the bacon jam.
Can I use turkey bacon instead of regular bacon for the jam? Yes, you can use turkey bacon; just keep in mind that the flavor will be slightly different, and the texture may not be as crispy. Cooking times may also vary, so monitor it closely to avoid overcooking.
Are these sliders gluten-free? To make the sliders gluten-free, simply substitute the slider buns with gluten-free buns. The other ingredients, including the bacon jam, are naturally gluten-free, making it easy to enjoy this dish without gluten.
Can I prepare the bacon jam in advance? Absolutely! The bacon jam can be made ahead and stored in an airtight container in the refrigerator for up to two weeks. Just warm it up slightly before using it on your sliders for the best flavor.
How can I adjust the spice level of the bacon jam? You can easily adjust the spice level by modifying or omitting the red pepper flakes. For a milder flavor, leave them out entirely; if you prefer more heat, consider adding a pinch of cayenne pepper or a dash of hot sauce when cooking.
What cooking method works best for grilling the patties? Grilling is ideal for these patties as it gives them a nice char and smoky flavor. However, you can also cook them in a skillet over medium-high heat if you don’t have access to a grill; just ensure they are cooked evenly on both sides.
One Last Thing
Bacon Jam Cheeseburger Sliders are not just a dish; they’re a delightful experience that brings together the sweet and savory flavors of bacon in a way that will impress your guests and make any gathering unforgettable. For more tasty options, be sure to check out [BBQ Pulled Pork Sliders] or [Classic Mini Meatball Subs] to keep the party going! We’d love for you to save this recipe on Pinterest and share your slider creations with our community in the comments below!


Leave a Comment