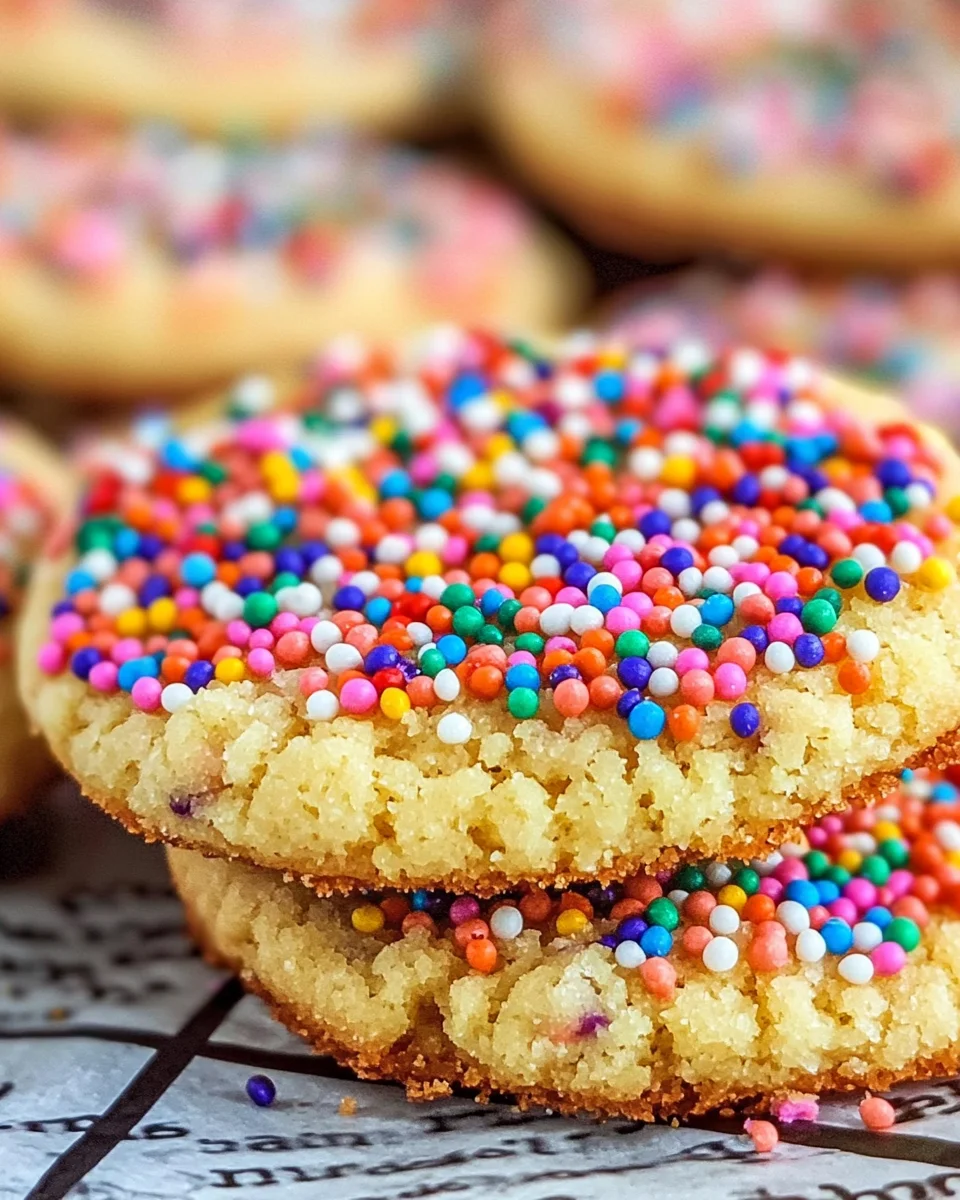
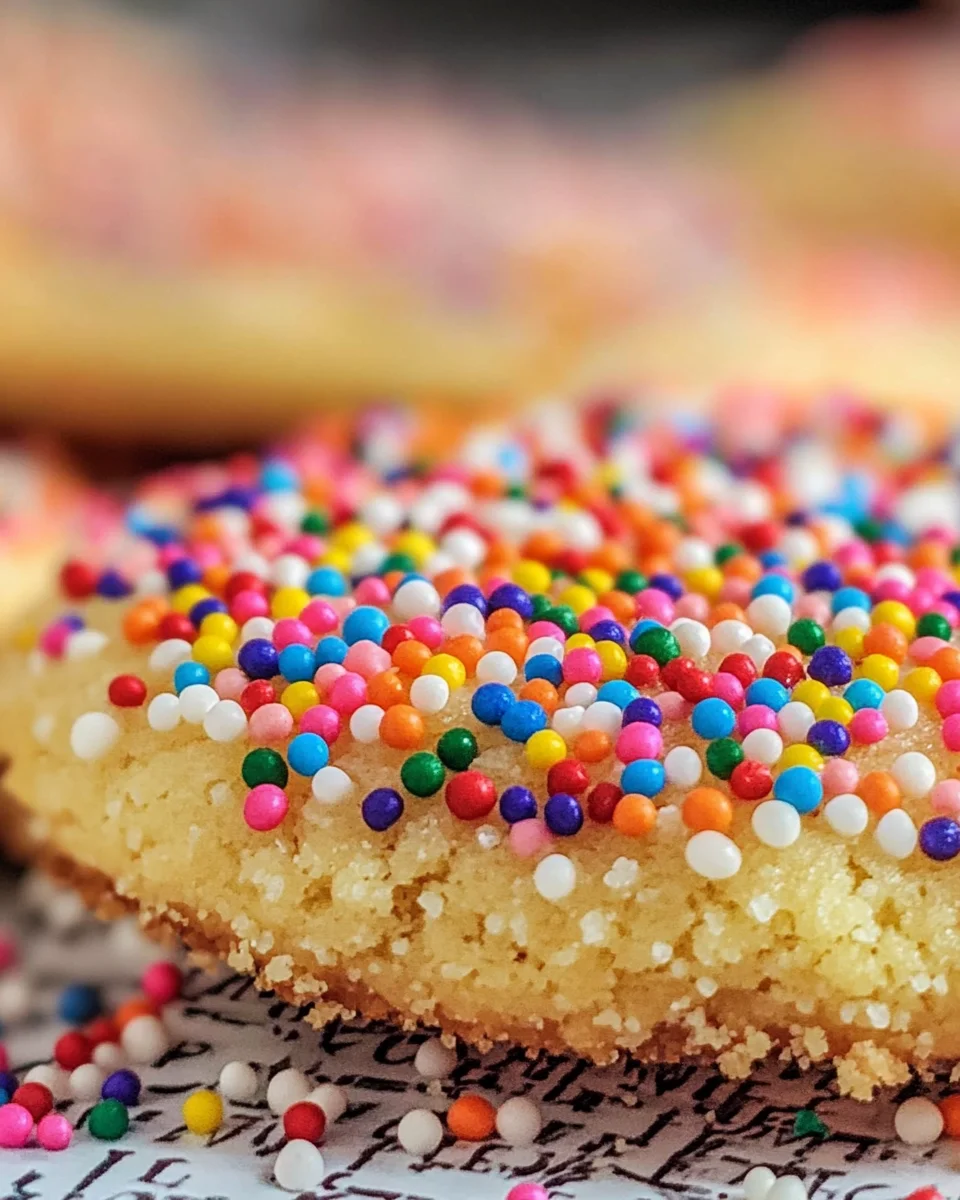
Soft & Chewy Sprinkle Cookies are the perfect treat for any occasion, whether it’s a birthday party, holiday gathering, or just a sweet snack at home. Their vibrant colors and delightful chewiness will surely bring a smile to your face. With simple ingredients and easy steps, these cookies are both fun to make and delicious to eat. Plus, you can customize them with different colors of nonpareils to match any celebration or your mood!
Why You’ll Love This Recipe
- Versatile for Any Occasion: These cookies are perfect for birthdays, holidays, or just a special treat any day.
- Easy to Make: With straightforward instructions, even beginner bakers can whip these up in no time.
- Customizable Colors: Change the nonpareils to match the seasons or themes, making them a hit at parties.
- Deliciously Chewy: The unique combination of butter and shortening gives these cookies their irresistible chewy texture.
- Fun for Kids: Baking these cookies is a great activity for kids, letting them get creative with colors and shapes.
Tools and Preparation
Having the right tools makes baking Chewy Sprinkle Cookies easier and more enjoyable. Gather what you need before you start.
Essential Tools and Equipment
- Mixing bowl
- Cookie sheet
- Parchment paper or non-stick spray
- Mixer (hand or stand)
- Cooling rack
Importance of Each Tool
- Mixing bowl: A large mixing bowl is essential for combining ingredients without spilling.
- Cookie sheet: A sturdy cookie sheet ensures even baking and prevents warping.
- Mixer: Using a mixer saves time and effort when creaming butter and sugar together.
Ingredients
Soft & Chewy Sprinkle Cookies – change colors with the seasons and your mood!
For the Dough
- 1/2 cup salted butter (softened)
- 1/2 cup shortening
- 1 1/2 cups white sugar
- 2 Eggs
- 1 teaspoon Vanilla
For the Dry Ingredients
- 2 3/4 cups All-Purpose Flour
- 2 teaspoons Cream of Tartar
- 1 teaspoon Baking Soda
For the Coating
- 5 – 10 ounces nonpareils
How to Make Chewy Sprinkle Cookies
Step 1: Preheat the Oven
Preheat your oven to 400 Degrees F. This ensures that your cookies bake evenly right from the start.
Step 2: Prepare Your Cookie Sheet
Cover a cookie sheet with parchment paper or use non-stick spray. This will prevent sticking and make cleanup easier.
Step 3: Cream Together Butter and Sugar
In a large mixing bowl, cream together butter, shortening, and sugar until light and fluffy. This process incorporates air into the mixture, helping your cookies rise.
Step 4: Add Vanilla
Stir in vanilla extract. The vanilla adds depth of flavor to your cookies.
Step 5: Incorporate Eggs
Beat in the eggs one at a time. Remember to scrape down the sides of the bowl after each addition to ensure everything is mixed well.
Step 6: Combine Dry Ingredients
In a separate small bowl, combine flour, cream of tartar, and baking soda. This helps distribute the leavening agent evenly throughout the dough.
Step 7: Mix Dry Ingredients into Wet Mixture
Slowly add this dry mixture to the butter mixture. Blend just until combined—over mixing can lead to tougher cookies.
Step 8: Prepare Nonpareils
Place nonpareils in a bowl. You will roll your cookie dough in these colorful sprinkles.
Step 9: Shape Your Cookies
Form cookie dough into balls and then slightly flatten them into small disks. The flattened shape helps them bake evenly.
Step 10: Coat with Nonpareils
Roll each disk in nonpareils, pressing lightly on both sides so they stick well.
Step 11: Arrange on Baking Sheet
Place your coated cookies on the prepared baking sheet about three inches apart. They will spread while baking.
Step 12: Bake Your Cookies
Bake at 400 Degrees F for about 8 to 12 minutes. Look for cookies that are slightly puffed but not wet; some dough should still peek through between nonpareils.
Step 13: Remove from Oven
Carefully take your cookies out of the oven once they reach that perfect look.
Step 14: Cool Slightly on Baking Sheet
Allow cookies to cool on the baking sheet for about one to two minutes before transferring them.
Step 15: Transfer to Cooling Rack
Gently remove cookies from the baking sheet using a spatula, placing them onto a cooling rack.
Step 16: Cool Completely
Let cookies cool completely before stacking or storing them in containers. Any remaining heat may cause condensation that can stain other cookies with color from nonpareils.
Enjoy your homemade Chewy Sprinkle Cookies! They make delightful snacks or gifts that everyone will love!
How to Serve Chewy Sprinkle Cookies
Chewy Sprinkle Cookies are delightful treats that can brighten any occasion. Here are some creative serving suggestions to make the most of your delicious cookies.
With a Glass of Milk
- Pair your cookies with a cold glass of milk for a classic combination that enhances the cookie’s sweetness.
Cookie Sandwiches
- Use two Chewy Sprinkle Cookies to create fun sandwich cookies. Add frosting or ice cream in between for an extra indulgent treat.
Dessert Platter
- Arrange these colorful cookies on a dessert platter alongside other sweets like brownies and cupcakes for a festive look at parties.
Gift Bags
- Package cookies in clear bags tied with ribbons. They make great gifts for holidays, birthdays, or thank-you gestures.
Ice Cream Topping
- Crumble Chewy Sprinkle Cookies over vanilla ice cream. The sprinkles will add a pop of color and flavor to your dessert.
Coffee Companion
- Serve your cookies with a warm cup of coffee or tea. The sweetness of the cookie contrasts beautifully with the rich flavors of the beverage.
How to Perfect Chewy Sprinkle Cookies
Achieving the perfect Chewy Sprinkle Cookies requires attention to detail. Follow these tips to ensure your cookies turn out just right.
- Use room temperature ingredients: Let butter and eggs sit out until they reach room temperature for optimal mixing and texture.
- Don’t overmix: Combine ingredients just until incorporated to keep your cookies chewy rather than tough.
- Chill the dough: If time allows, chill the dough for 30 minutes before baking. This helps the cookies maintain their shape.
- Check baking time: Keep an eye on your oven! Remove cookies when they look slightly puffy and aren’t wet, as they will continue to bake on the sheet.
- Proper storage: Store cooled cookies in airtight containers to keep them fresh and chewy longer.
- Experiment with sprinkles: Try different colors or types of sprinkles for various occasions, making them fun for any celebration!
Best Side Dishes for Chewy Sprinkle Cookies
While Chewy Sprinkle Cookies are delicious on their own, pairing them with side dishes can create a well-rounded dessert experience. Here are some tasty options:
- Fruit Salad: A refreshing mix of seasonal fruits balances the sweetness of the cookies.
- Chocolate Mousse: Rich chocolate mousse pairs well with sweet cookies, enhancing their flavors.
- Yogurt Parfait: Layer yogurt with granola and fruit for a healthy yet indulgent side.
- Cheese Platter: Include mild cheeses like brie or goat cheese, which complement sweet treats nicely.
- Brownies: Serve alongside fudgy brownies for a double dose of sweetness sure to please any crowd.
- Ice Cream Sundae Bar: Set up a sundae bar with toppings where guests can create their own desserts using Chewy Sprinkle Cookies as one of the options.
- Coffee Cake: A slice of coffee cake is perfect for brunch or afternoon tea alongside your cookies.
- Pudding Cups: Offer chocolate or vanilla pudding cups as a creamy counterpart to the chewy texture of the cookies.
Common Mistakes to Avoid
Making Chewy Sprinkle Cookies can be a delightful experience, but certain mistakes can lead to disappointing results. Here are some common pitfalls and how to steer clear of them.
- Measuring: Not measuring ingredients accurately can ruin the texture. Always use proper measuring cups and spoons.
- Overmixing: Mixing the dough too much makes cookies tough. Combine ingredients just until they are blended for that chewy texture.
- Ignoring Temperature: Starting with cold butter affects the creaming process. Make sure your butter is softened for the best results.
- Skipping Parchment Paper: Baking directly on the sheet can lead to sticking. Always line your baking sheet with parchment paper or use non-stick spray.
- Underbaking: Removing cookies too early can lead to doughy centers. Bake until cookies are just set and slightly puffed for perfect chewiness.
Storage & Reheating Instructions
Refrigerator Storage
- Store Chewy Sprinkle Cookies in an airtight container.
- They will stay fresh for up to one week in the refrigerator.
Freezing Chewy Sprinkle Cookies
- Place cooled cookies in a single layer on a baking sheet before freezing.
- Once frozen, transfer them to a freezer-safe bag or container for up to three months.
Reheating Chewy Sprinkle Cookies
- Oven: Preheat oven to 350°F and warm cookies for about 5 minutes for that freshly baked taste.
- Microwave: Heat cookies individually for about 10-15 seconds for a soft, warm treat.
- Stovetop: Use a skillet over low heat, placing a cookie inside and covering it for about 1 minute.
Frequently Asked Questions
What are Chewy Sprinkle Cookies?
Chewy Sprinkle Cookies are soft and colorful treats perfect for any occasion. They are made with basic ingredients and topped with vibrant nonpareils.
How do I make Chewy Sprinkle Cookies more festive?
You can customize these cookies by using themed sprinkles according to holidays or events, adding flavors like almond or lemon extract, or incorporating chocolate chips.
Can I substitute ingredients in Chewy Sprinkle Cookies?
Yes! You can replace shortening with additional butter, or use gluten-free flour for a gluten-free version of these cookies.
How should I store Chewy Sprinkle Cookies?
Store them in an airtight container at room temperature or refrigerate them to keep them fresh longer.
Final Thoughts
Chewy Sprinkle Cookies offer both comfort and joy, making them an ideal choice for any gathering. Their versatility allows you to change colors and flavors based on your mood or season. Don’t hesitate to try this delightful recipe and explore your creative options!
Chewy Sprinkle Cookies

Chewy Sprinkle Cookies are a delightful, colorful treat that brings joy to any occasion. With their soft and chewy texture, these cookies are perfect for birthdays, holidays, or simply as a sweet snack at home. Easy to make with simple ingredients, you can customize them with vibrant nonpareils to match your celebrations or personal preferences. Whether you’re an experienced baker or just starting out, this recipe guarantees a fun and delicious experience. Share them at gatherings or enjoy them as a special dessert—these cookies are bound to bring smiles and happiness!
- Prep Time: 15 minutes
- Cook Time: 10 minutes
- Total Time: 25 minutes
- Yield: Approximately 24 cookies 1x
- Category: Dessert
- Method: Baking
- Cuisine: American
Ingredients
- 1/2 cup salted butter (softened)
- 1/2 cup shortening
- 1 1/2 cups white sugar
- 2 large eggs
- 1 teaspoon vanilla extract
- 2 3/4 cups all-purpose flour
- 2 teaspoons cream of tartar
- 1 teaspoon baking soda
- 5 – 10 ounces nonpareils (colorful sprinkles)
Instructions
- Preheat the oven to 400°F (200°C).
- Line a cookie sheet with parchment paper.
- In a mixing bowl, cream together softened butter, shortening, and sugar until light and fluffy.
- Mix in the vanilla extract and beat in the eggs one at a time.
- In another bowl, whisk together flour, cream of tartar, and baking soda; gradually add to the wet mixture until just combined.
- Roll the dough into balls, flatten slightly, and coat both sides in nonpareils.
- Place on the prepared cookie sheet about three inches apart.
- Bake for 8–12 minutes until puffed but not wet; cool slightly before transferring to a rack.
Nutrition
- Serving Size: 1 cookie (30g)
- Calories: 135
- Sugar: 9g
- Sodium: 75mg
- Fat: 6g
- Saturated Fat: 2g
- Unsaturated Fat: 3g
- Trans Fat: 0g
- Carbohydrates: 18g
- Fiber: 0.5g
- Protein: 2g
- Cholesterol: 20mg

Leave a Comment